To give you some context before we move any futher, Growth Hacking University comes in three forms: online, in-house (intracompany training), and in-class courses. Regarding the in-class programs, they take place -for the time being- in three European cities – namely Bucharest, London, and Athens.
In the case of Athens, the Department for Work fully subsidizes this course. And this is exactly the piece of information we needed to communicate – that they can come for free. We needed to let people know about this, as most employees don’t.
This post is about how we did that.
Enjoy.
Step 1: Creating the PDF Document
First things first, we had to create the PDF.

Thus, we starting writing the content per se on a google doc. We wrote the text, created the images and logos, inserted the creatives in the doc and exported everything this good-looking pdf.
Resources used
Growth Master – 6 hours: Concept, brief and communications
Copywriter – 8 hours: Writing the doc
Designer – 16 hours: Images, logos, design
Step 2: The Product on the Website
Then, we had to let people know that they could join an in-class 51-hours growth hacking course for free.
First, there is the homepage of Growth Hacking University, where someone can find any of our courses. Every one of these courses has pretty much the same structure: The name of the course, a few lines explaining what the course is about, and finally, the when and where of the course. However, our growth hacking course was featuring one more thing. A copy which was reading: “Ask your boss to pay for the course”.

Upon hovering each one of the courses, two call-to-actions appear: ‘LEARN MORE’, and ‘BOOK NOW’. However, the card with the growth hacking course differed once more, as it had a third -bigger- CTA button: ‘TELL YOUR BOSS’.

Resources used
Strategist – 2 hours: Thinking and designing the whole process
Copywriter – 1 hour: Writing the copies
Developer – 3 hours: Applying the above on the website
Step 3: The Webhook
As growth marketers, the first thing we want from our visitor, be it a fellow marketer or not, is their email. But of course! And so, after the visitor clicks to get the pdf, we ask for their email, and then we send them the pdf through email.
Moving on, we created the form. We also inserted a webhook – an event that was triggered upon the PDF submission.
This was made possible with Appocalypsis, which among other things, features countless widgets.

Resources used
Automation marketing expert – 2hours: Make the automation
Step 4: Zapier Automation
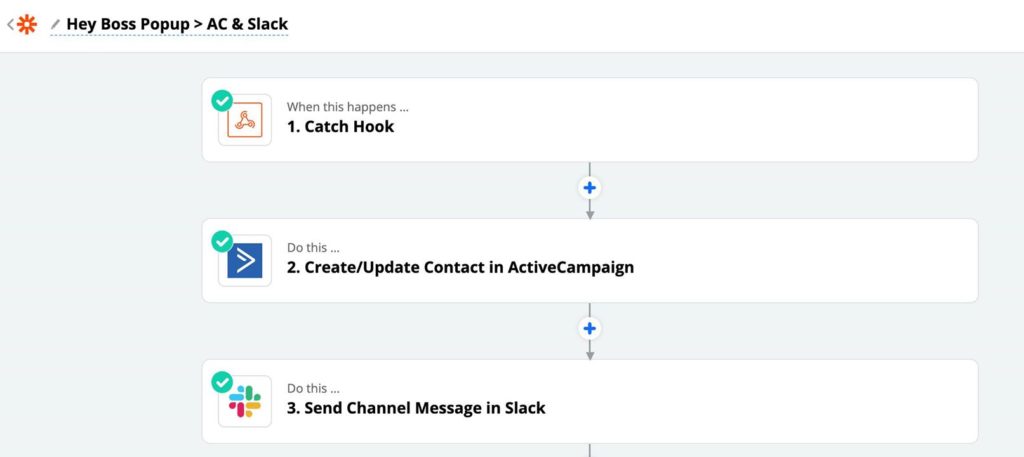
Our love for Zapier is well-known. Through Zapier we connected Catch Hook with Active Campaign and the latter with Slack.
This is what the zap looked like:
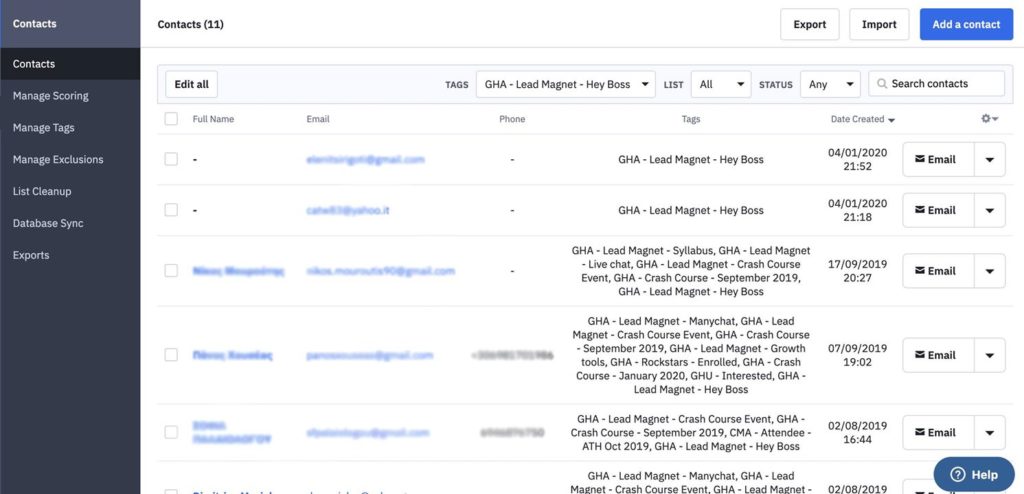
This is what Active Campaign looked like. Notice how there are different tags for different actions:
Finally, this is what the channel in Slack looked liked.
Whenever someone was downloading the PDF, a message on Slack was appearing:

Resources used
Marketing automation expert – 5 hours: Automation creation and testings
Step 5: Active Campaign Automation
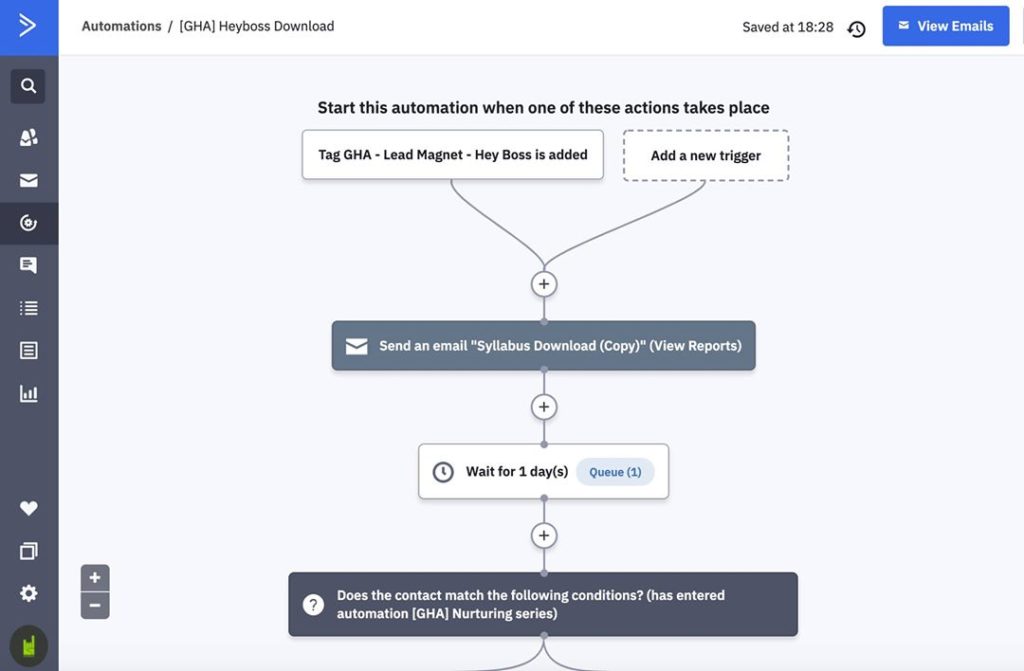
In this step, we had to make a lead nurturing automation on Active Campaign.
Naturally, the automation included:
- A tag.
- The email copy.

Resources used
Marketing automation expert – 3 hours: Automation creation and testings
Copywriter – 3 hours: Email copy
Step 7: Bit.ly Link & Testings
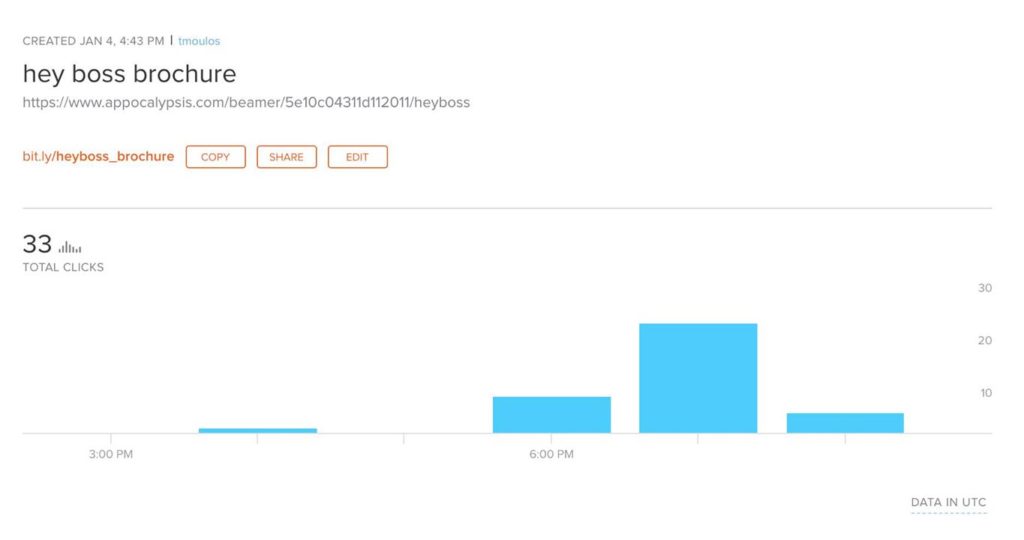
In this step, we had to bitlify the beamer link from Appocalypsis from Step 3.
And thus, we made a custom link in bit.ly, the popular URL shortener.
In this step we also had to make sure that everything until now works and that our automation has no mistakes.

Resources used
Marketing automation expert – 2 hours: Automation creation and testings
Step 7: The Looks
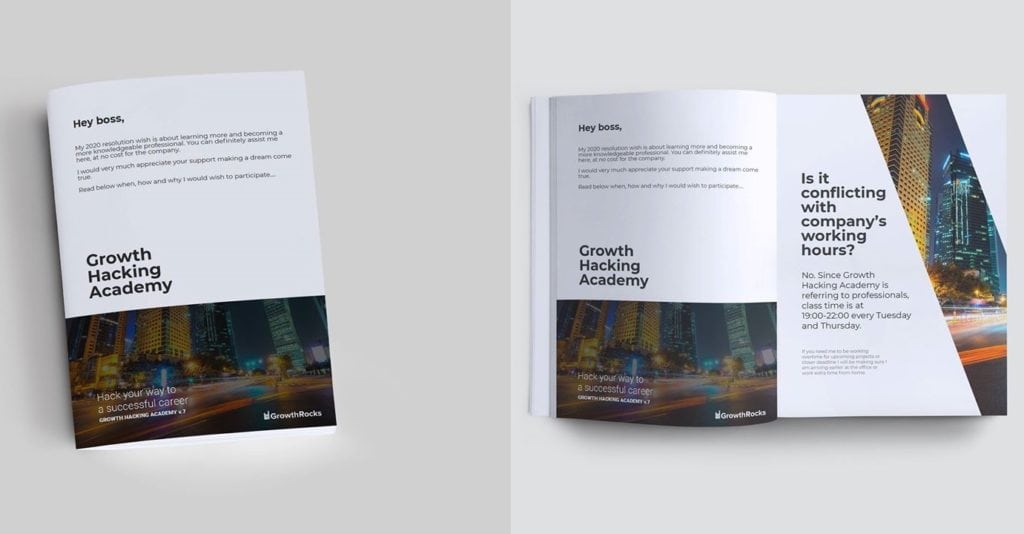
Remember the PDF file from the first step? Well, it looked great and everything but its purpose is to be downloaded – not be displayed anywhere.
So, we had to create an image where it would be featured in a more presentable form.
First, we found the appropriate product mockup in Envato Elements – which, by the way, I’m in love with. Then, a designer had to edit the mockup in Photoshop and bring our PDF to life. Like that:
Resources used
Designer – 2 hours: Finding the appropriate mockup and editing in Photoshop.
Step 8: Documentation
Last but not least, we had to document the whole process so the next time we make something similar, we will do it faster and better.
This time, however, we shared that process with you. And I hope it taught you something useful.
Please leave a comment if you have any questions. I will be more than happy to answer them!
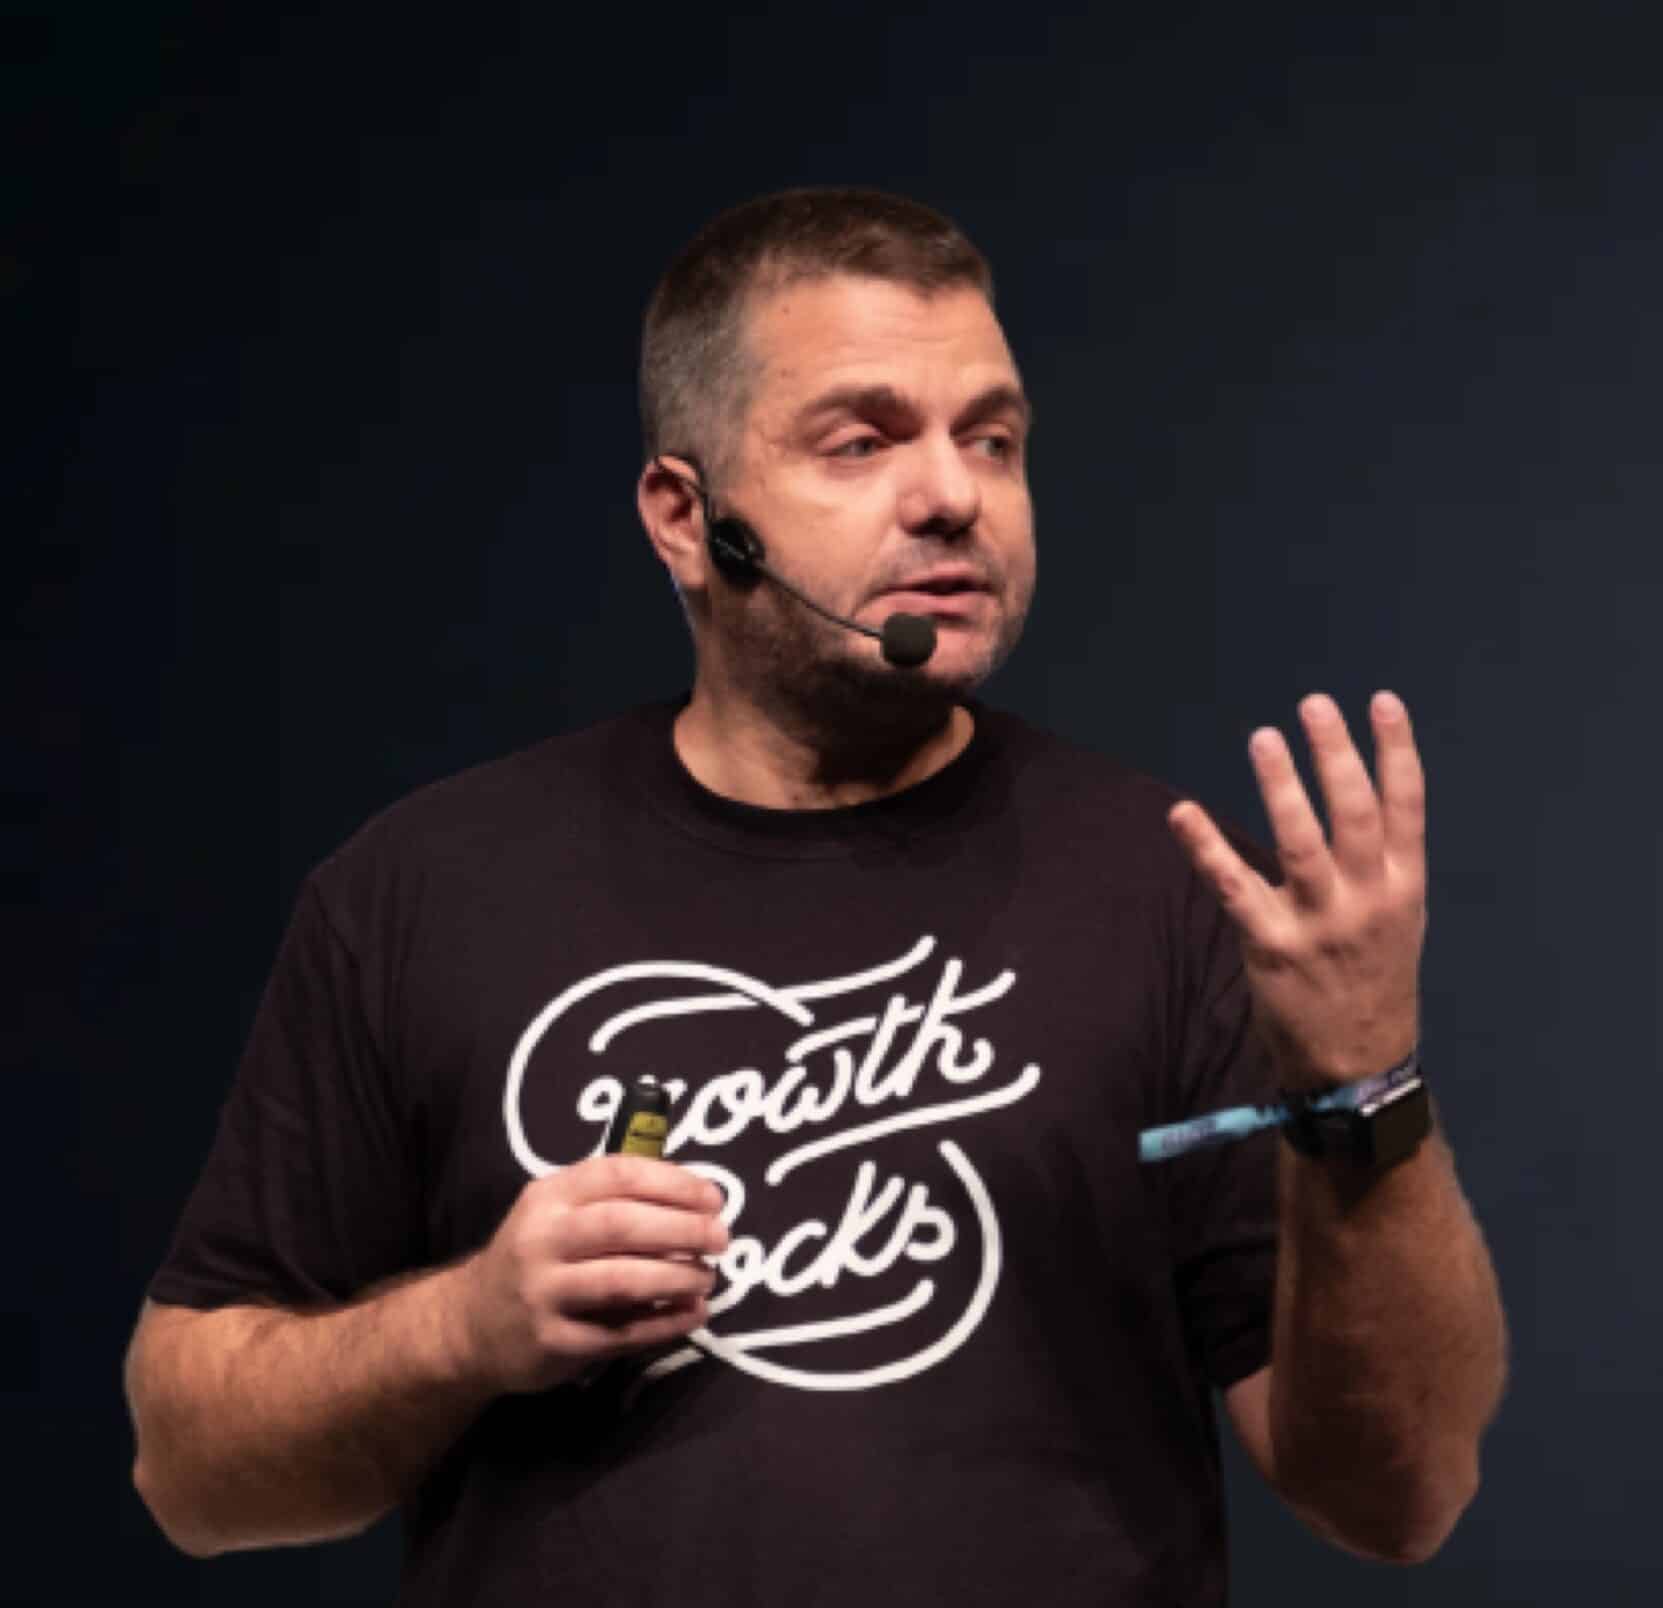
Theodore has 20 years of experience running successful and profitable software products. In his free time, he coaches and consults startups. His career includes managerial posts for companies in the UK and abroad, and he has significant skills in intrapreneurship and entrepreneurship.
